At the start of this module I was not very confident with using this program. I was nervous about even touching the keyboard during the production of anything because, as I've found out through unfortunate events, most of the keys are shortcuts for zooming, changing camera views, taken away icons etc. I found this very annoying and this held me back quite a lot during this module because I couldn't find what I had done wrong until I could go back into a tutorial. I found the program had too many options, a lot of which were hidden behind buttons and tabs. I got very frustrated with the program. However, as time went on I found a great liking for the program and found that it enabled me to do many things I was never able to do before. I am very glad I learnt how to use 3DS Max because ti has allowed me to learn many new skills and find out about many different ways I can create and manipulate an image or a 3D object.
I was very surprised at how easy I picked up the ability to make object through creating the stamps. I had barely done 4/5 tutorials before I started one of my stamps. I admit I was very uncomfortable with using the program at first but I picked it up pretty quick and soon enough I was thoroughly enjoying making the stamps.
Thursday, 10 December 2009
Final Stamps
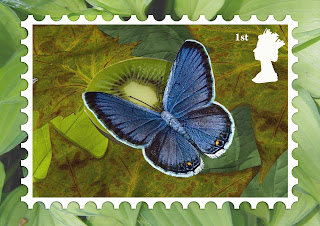
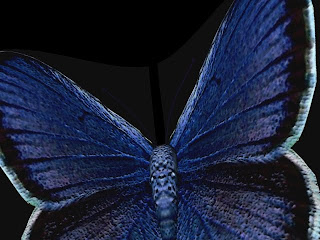
The Butterfly Stamp
This stamp is my personal favourite because I love butterflies. I found this stamp very easy to do because I started this stamp last, therefore I knew many techniques from tutorials and the other stamps. I am happy with the way this stamp turned out because I like the way the butterfly looks and how it stands out against a natural background.
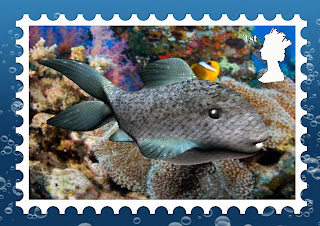
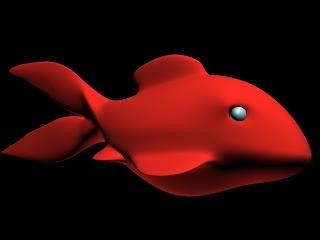
The Fish Stamp
This stamp was very difficult to do as I started this one first and finished it last. It took me a very long time to do and I got very frustrated with it. Because I started this one first I was not very familiar with all the tools and what I was capable of doing in the program. The shape of the fish took a very long time to create. I am happy with the way it turned out because of all the time and effort I spent on it.
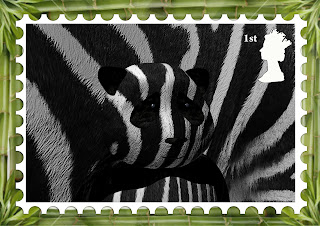
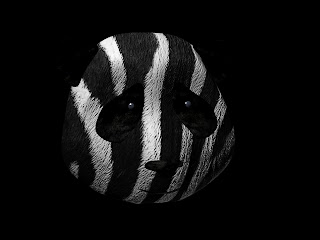
The Panda/Zebra Stamp
This was one of the easiest stamps to produce because it started as a simple round circle and progressed from there. Because I saw progression straight away I found that I was happy with how I was getting along and wanted to do more to improve on it. I am impressed with how this stamp turned out. I didn't think this stamp would look this good.
This stamp is my personal favourite because I love butterflies. I found this stamp very easy to do because I started this stamp last, therefore I knew many techniques from tutorials and the other stamps. I am happy with the way this stamp turned out because I like the way the butterfly looks and how it stands out against a natural background.

The Fish Stamp
This stamp was very difficult to do as I started this one first and finished it last. It took me a very long time to do and I got very frustrated with it. Because I started this one first I was not very familiar with all the tools and what I was capable of doing in the program. The shape of the fish took a very long time to create. I am happy with the way it turned out because of all the time and effort I spent on it.

The Panda/Zebra Stamp
This was one of the easiest stamps to produce because it started as a simple round circle and progressed from there. Because I saw progression straight away I found that I was happy with how I was getting along and wanted to do more to improve on it. I am impressed with how this stamp turned out. I didn't think this stamp would look this good.

The Butterfly - Final Images
These are the final images of the Butterfly. The butterfly is currently my favourite of all three because I thoroughly enjoyed making it. I love butterflies and in my opinion, this will be the most interesting stamp. I have decided to use the last image because it shows the best view point.


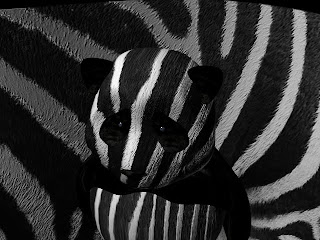
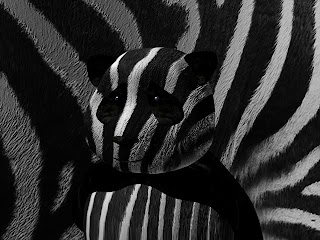
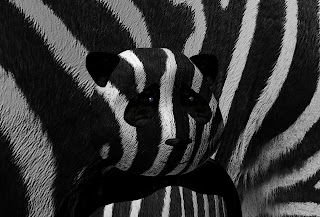
The Panda/Zebra - Final Images
These are the final images for the Panda/Zebra. I am very impressed with the way these turned out. I thought it would be very difficult to achieve the camouflage look and therefore I thought that the images would not look very good. I have decided to use the last image for the stamp as it has the best view point.


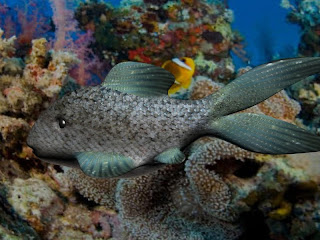
The Fish - Final Images
These are the final images of the fish. I've decided to use the last one for the stamp. I am very happy with these images because the fish took a very long time to make and I didn't expect it would look as good as this.


The Fish - Part 5
The fish is nearly finished. I have just added some finishing touches to it. I wanted to put the fish in its habitat.
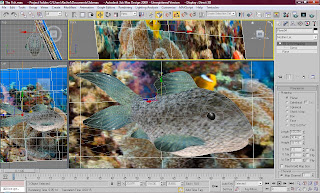
I created a plane and used the material editor tool to add a picture of a colour coral reef. I adjusted the picture to make sure that it fit nicely behind the fish to give the fish a perfect background.

The picture below is the rendered image of the background. I wanted to see how it would look after it had been rendered.
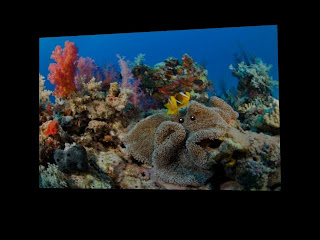
I then put the background and the fish together and positioned them well to create the final view before I rendered for the final time.

The Panda/Zebra - Part 4
After I thought I had completed the fish I looked at the image and thought there was something missing. I didn't like the way the panda's head looked like it was floating, so i decided to create the panda's body.
The body was very hard to create. I had to make sure that it looked very similar to the way a panda is shaped. I created the main part of the body with a simple sphere and some texture using the material editor. The arms and shoulders were not so easy because they did not have a basic shape to them. I made one arm using a cylinder and the 'edit poly' modifier. I also used the 'soft selection' tool to make sure that they looked even. After I had spent a lot of time making one arm i used the 'symmetry' tool to create an exact replica on the other side of the body. I used the 'mirror' option to move it into the perfect position. I then used the material editor to put black fur texture on both the arms.
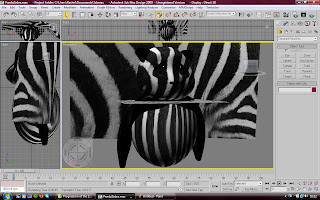
This is a rendered image showing the panda in full. I am happy with how the panda turned out because even though it has a zebra's texture, it still looks like a realistic panda.

The Fish - Part 4
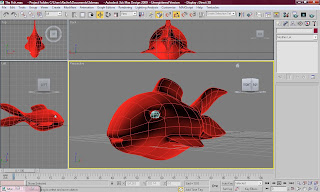
Once I had created the basic shape of the fish, I realised that I hadn't given the fish a mouth. I gave it a subtle mouth my using the 'inset' tool in the 'edit poly' modifier. My fish shape was then complete.
I then needed to add a texture to the fish to make it look more realistic. I thought about my original idea of camouflaging the fish and I thought I could probably make a better stamp by giving the fish scales and putting it in its usual habitat. I then searched the Internet for some decent picture of fish scales but it was very difficult to find some that matched the fish and looked good. Because I couldn't find anything suitable I made my own fish texture with the images below.

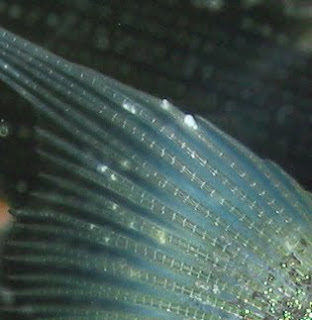
I then put these images together in Adobe Photoshop to make sure that the pictures were in the right places. I had to go back and keep moving the pictures to position them perfectly.
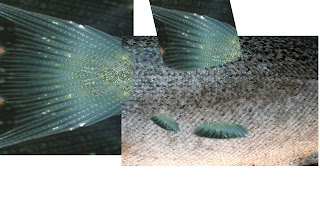
I used the 'UVW Mapping' modifier tool to make sure that the image wrapped around the fish well. I then changed the colour of the fishes eyes because the bright green colour didn't look realistic. I did this by using the material editor and gave the black eye a gloss to make it look shiny.

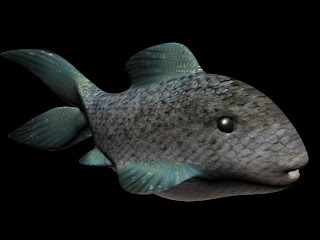
This is the rendered image of the finished fish without the background. I am more than happy with this image because I did not expect it to look this good. I like the way I was able to blend the pictures with each other to make the fish look like it has different texture fins and body.

I then needed to add a texture to the fish to make it look more realistic. I thought about my original idea of camouflaging the fish and I thought I could probably make a better stamp by giving the fish scales and putting it in its usual habitat. I then searched the Internet for some decent picture of fish scales but it was very difficult to find some that matched the fish and looked good. Because I couldn't find anything suitable I made my own fish texture with the images below.


I then put these images together in Adobe Photoshop to make sure that the pictures were in the right places. I had to go back and keep moving the pictures to position them perfectly.

I used the 'UVW Mapping' modifier tool to make sure that the image wrapped around the fish well. I then changed the colour of the fishes eyes because the bright green colour didn't look realistic. I did this by using the material editor and gave the black eye a gloss to make it look shiny.

This is the rendered image of the finished fish without the background. I am more than happy with this image because I did not expect it to look this good. I like the way I was able to blend the pictures with each other to make the fish look like it has different texture fins and body.

The Panda/Zebra - Part 3
I wanted to make it seem as though there was a large version of a zebra or just the zebra skin behind the panda. For this I had to create a backdrop which was a plane with the same texture as the panda's face. I used the material editor and made the plane shown below.
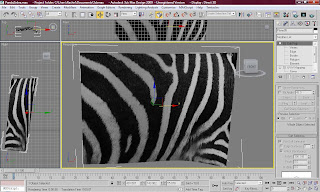
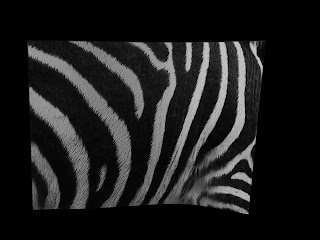
This is the rendered image of the backdrop I made for the panda. I was quite impressed with it because it gives a good texture, especially after I used the 'bump' feature in the materials.
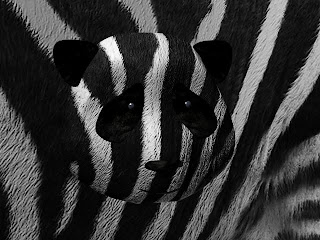
This is the rendered image of the panda in front of the backdrop. It is very well camouflaged even though it can still clearly be seen. I am happy with this render.

The Butterfly - Part 3
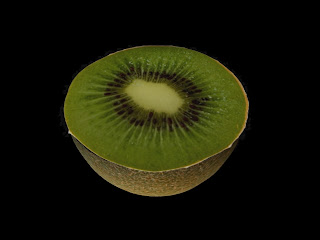
After I researched into butterflies, I found out that they like anything which is brightly coloured and they are also attracted to sweet foods, mainly fruits. Because of this, I decided to place the butterfly in its perfect habitat with leaves and fruit. I decided to make a kiwi because I know it has a bright inside layer and it is also sweet.
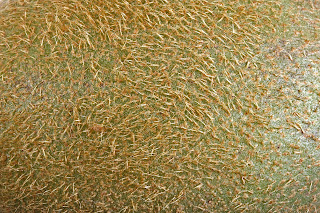
These are the materials that I chose form the Internet to put on the kiwi shape to add texture.
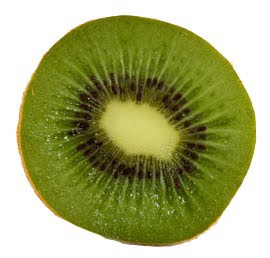
The picture below shows the shape of the kiwi. I made it by taking a sphere and cutting it in half to make it seem like the kiwi had been cut in half. I then connected the shape to made sure i could put a texture on the inside of the kiwi.
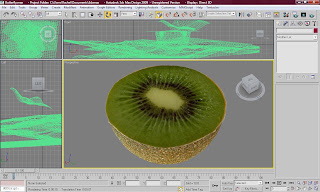
This is the rendered image of the kiwi. I was very happy with the way this came out because i found it very difficult to create the kiwi and it came out better than I expected.
Once I had created my kiwi, i put it with the other 3D objects to make the butterfly habitat. I then added the butterfly sitting on top of the kiwi.

These are the materials that I chose form the Internet to put on the kiwi shape to add texture.


The picture below shows the shape of the kiwi. I made it by taking a sphere and cutting it in half to make it seem like the kiwi had been cut in half. I then connected the shape to made sure i could put a texture on the inside of the kiwi.

This is the rendered image of the kiwi. I was very happy with the way this came out because i found it very difficult to create the kiwi and it came out better than I expected.

Once I had created my kiwi, i put it with the other 3D objects to make the butterfly habitat. I then added the butterfly sitting on top of the kiwi.

The Panda/Zebra - Part 2
I was looking forward to carrying on with the panda/zebra because I find this one the easiest to do and also the most rewarding. I was very happy with the shape of the head after a lot of reshaping and looking at images on the Internet. I Eventually had the shape shown in the pictures below. Because I was happy with the shape, I enjoyed focusing on other parts of the panda such a the textures.
I eventually created the panda's eyes, nose and mouth after lots of reshaping and positioning. I simply used spheres and cylinders to create the features and used the 'edit poly' modifier to reshape them.

Below is the rendered image of the Panda with its features. I was very happy with the way it looked at this point.
I then needed to add materials to particular parts of the panda so I found the images shown below to create different textures. I want the panda to blend in with the background so I want the panda's face to have a zebra skin texture instead of it's own natural texture.
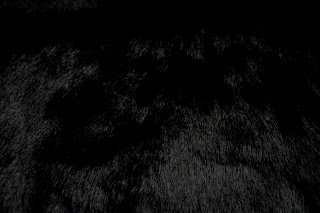
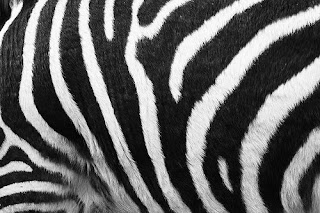
The picture below shown the panda after I used the material editor to change the texture. I was very pleased with the way it turned out because it still looked like a panda, even with zebra skin. I think the black fur also turned out very well and gives it an effective texture look.
I eventually created the panda's eyes, nose and mouth after lots of reshaping and positioning. I simply used spheres and cylinders to create the features and used the 'edit poly' modifier to reshape them.

Below is the rendered image of the Panda with its features. I was very happy with the way it looked at this point.

I then needed to add materials to particular parts of the panda so I found the images shown below to create different textures. I want the panda to blend in with the background so I want the panda's face to have a zebra skin texture instead of it's own natural texture.


The picture below shown the panda after I used the material editor to change the texture. I was very pleased with the way it turned out because it still looked like a panda, even with zebra skin. I think the black fur also turned out very well and gives it an effective texture look.

The Fish - Part 3
I left the fish for a long while because I could not get to grips with the fish in the same way I was wish the others. I had many problems because I accidentally pressed shortcuts I didn't mean to and needed to use tools I was unfamiliar with.
I used the inset and extrude tools in the 'edit poly' modifier. to make the basic outline of the fishes tail. This was not as difficult as I first thought because all I had to do was make different segments in the tail and shape it so that it lined up with the guideline image I put on there in the beginning.
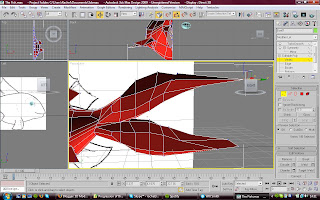
This is the rendered image of the fish so far with its much needed tail.

The Butterfly - Part 2
Once the butterfly was finished I looked back at it and realised that I forgot to add the butterfly's antenna. I completed the butterfly by making one antenna out of a cylinder by using the 'edit poly' modifier and I used the 'symmetry' modifier to mirror the image onto the other side of the butterfly.
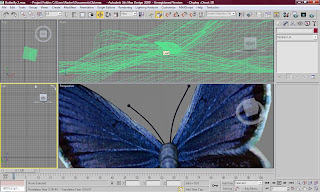
You can only see the antenna on the butterfly in the rendered image below if you look really closely. Hopefully the antenna will be seen better on the final rendered image.
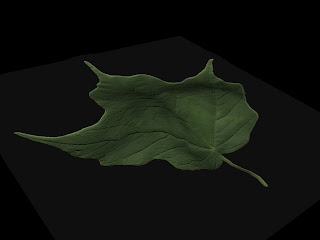
After I created the butterfly I had to created its habitat. For this I knew that leaves would be best as I knew how to create them through tutorials and butterflies are associated with leaves and flowers. I used past tutorials to create the leaf shown below. I used the left image for the material on the leaf and the second image is to make the parts that are not leaf transparent.
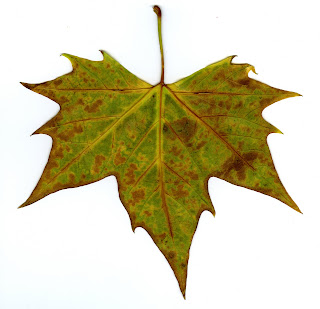

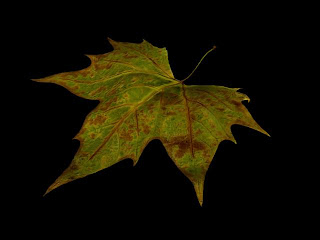
I then reshaped the leaf to make it look more realistic and to give it the crinkle effect of an autumn leaf. I needed to create a few of leaves to make it look like the butterfly was surrounded by many leaves in either a forest or a garden.

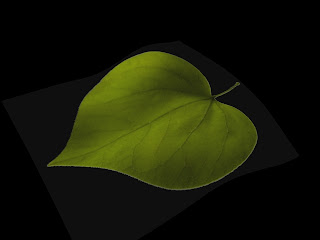
This is the rendered image of the leaf that i created for the butterfly's habitat. I also created toehr leaves to make it look like there are all different types of leaves on the floor. The renders of the other leaves are also shown below.

You can only see the antenna on the butterfly in the rendered image below if you look really closely. Hopefully the antenna will be seen better on the final rendered image.

After I created the butterfly I had to created its habitat. For this I knew that leaves would be best as I knew how to create them through tutorials and butterflies are associated with leaves and flowers. I used past tutorials to create the leaf shown below. I used the left image for the material on the leaf and the second image is to make the parts that are not leaf transparent.


I then reshaped the leaf to make it look more realistic and to give it the crinkle effect of an autumn leaf. I needed to create a few of leaves to make it look like the butterfly was surrounded by many leaves in either a forest or a garden.

This is the rendered image of the leaf that i created for the butterfly's habitat. I also created toehr leaves to make it look like there are all different types of leaves on the floor. The renders of the other leaves are also shown below.


The Panda/Zebra - Part 1
I thought the panda would be the most difficult stamp to do but I was very wrong. The panda was quite easy apart from the features on the panda's face. I used many techniques which I learnt in tutorials and practiced on other stamps.
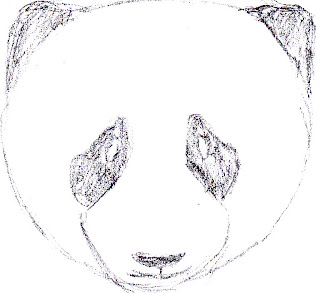
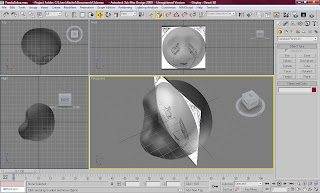
I used the picture I drew below to create the basic shape of the panda. I put this as a material on a plane and shaped a sphere around the shape of the template. I looked up many images on the Internet to get a good idea of the rough shape of the panda's head and looked into ways i could make it look more realistic.
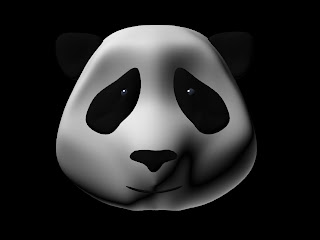
I created the main shape of the panda first without it's eyes or ears. This was very difficult as I did not know exactly what a pandas face looked like except for in images I had seen on the Internet. I Made eye sockets where I knew the black eye patches would be placed and I pulled out the nose. I also flattened the width of the head because a pandas head is not perfectly round. I used 'edit poly' modifier for this and the 'soft selection' tool. I also used 'TurboSmooth' modifier which enabled the head to have a smooth head shape. Another tool which helped me during this was the 'symmetry' tool. This allowed me to cut the head in half to make it equal on both sides and make sure that anything that I changed on one side of the head, would naturally change on the other side to make it symmetrical.
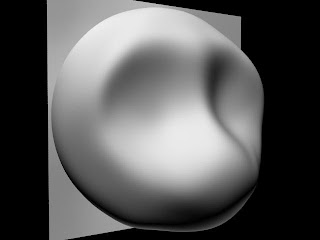
I rendered the image at this point to see what that head shape would look like after a render. The image below shows how it looked.
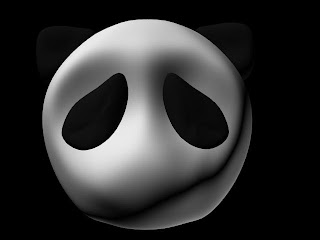
I then wanted to make the features of the face to make it look more realistic as the render above looked kind of creepy and blank and I was unsure about the shape of the head and how it would actually turn out. I then wanted to make the eye patches so I used a sphere and reshaped it using the 'edit poly' modifier. It was very difficult to do this as I was simply just going by an image and what I thought it might look like. I then used the 'symmetry' tool to make an identical eye patch on the other side of the panda's head. The ears were created in a similar way as the eyes and were very difficult to place on the panda's head because it was unsure of their exact position.

This is the panda at this stage. I rendered the image to see what it would look like. It has been suggested that from a distance it looks slightly like Jack from the film, The Nightmare Before Christmas. I was not happy with this comment for obvious reasons so I knew i had to fix the eyes somehow to make it look different.

Subscribe to:
Comments (Atom)